Difference between revisions of "Xbox 360 Lite On DVD Key Dumping - TIAO's Serial Key Extractor"

10 PCS, 10cm x 10cm, 2 layers prototype for $38.80 shipped!
| Line 2: | Line 2: | ||
<span class="plainlinks"> | <span class="plainlinks"> | ||
| − | [http://www. | + | [http://www.easymg.com/game-console-adapters/xbox-360-connectivity-kit-v3-and-usb-solderless-lite-on-dvd-key-extractor-combo.html http://www.easymg.com/media/catalog/product/cache/2/small_image/135x135/5e06319eda06f020e43594a9c230972d/u/s/usb_v3_big_small.jpg] [http://www.easymg.com/game-console-adapters/xbox-360-connectivity-kit-v3-and-solderless-lite-on-dvd-key-extractor-combo.html http://www.easymg.com/media/catalog/product/cache/2/small_image/135x135/5e06319eda06f020e43594a9c230972d/d/b/db9_v3_small.jpg] [http://www.easymg.com/game-console-adapters/xbox-360-dvd-power-adapter-with-on-off-switch-and-power-cable-version-3.html http://www.easymg.com/media/catalog/product/cache/2/small_image/135x135/5e06319eda06f020e43594a9c230972d/d/v/dvd-cable_thumb.jpg] [http://www.easymg.com/game-console-adapters/xbox-360-solderless-lite-on-dvd-key-extractor-addon-2.html http://www.easymg.com/media/catalog/product/cache/2/small_image/135x135/5e06319eda06f020e43594a9c230972d/u/s/usb_small.jpg] [http://www.easymg.com/game-console-adapters/xbox-360-case-opening-torx-tools.html http://www.easymg.com/media/catalog/product/cache/2/small_image/135x135/5e06319eda06f020e43594a9c230972d/D/G/DG-X360TOOL_small_1.jpg] [http://www.easymg.com/game-console-adapters/vt6421a-raid-pci-sata-controller-card-for-xbox-360.html http://www.easymg.com/media/catalog/product/cache/2/small_image/135x135/5e06319eda06f020e43594a9c230972d/D/G/DG-SATAPCI-1_small_1.jpg] |
| + | Buy Game Console Adapters from [http://www.easymg.com/game-console-adapters.html http://www.easymg.com] or [http://www.diygadget.com/store/game-console-adapters/cat_6.html http://www.diygadget.com] | ||
| − | |||
</span> | </span> | ||
| Line 355: | Line 355: | ||
<span class="plainlinks"> | <span class="plainlinks"> | ||
| − | [http://www. | + | [http://www.easymg.com/game-console-adapters/xbox-360-connectivity-kit-v3-and-usb-solderless-lite-on-dvd-key-extractor-combo.html http://www.easymg.com/media/catalog/product/cache/2/small_image/135x135/5e06319eda06f020e43594a9c230972d/u/s/usb_v3_big_small.jpg] [http://www.easymg.com/game-console-adapters/xbox-360-connectivity-kit-v3-and-solderless-lite-on-dvd-key-extractor-combo.html http://www.easymg.com/media/catalog/product/cache/2/small_image/135x135/5e06319eda06f020e43594a9c230972d/d/b/db9_v3_small.jpg] [http://www.easymg.com/game-console-adapters/xbox-360-dvd-power-adapter-with-on-off-switch-and-power-cable-version-3.html http://www.easymg.com/media/catalog/product/cache/2/small_image/135x135/5e06319eda06f020e43594a9c230972d/d/v/dvd-cable_thumb.jpg] [http://www.easymg.com/game-console-adapters/xbox-360-solderless-lite-on-dvd-key-extractor-addon-2.html http://www.easymg.com/media/catalog/product/cache/2/small_image/135x135/5e06319eda06f020e43594a9c230972d/u/s/usb_small.jpg] [http://www.easymg.com/game-console-adapters/xbox-360-case-opening-torx-tools.html http://www.easymg.com/media/catalog/product/cache/2/small_image/135x135/5e06319eda06f020e43594a9c230972d/D/G/DG-X360TOOL_small_1.jpg] [http://www.easymg.com/game-console-adapters/vt6421a-raid-pci-sata-controller-card-for-xbox-360.html http://www.easymg.com/media/catalog/product/cache/2/small_image/135x135/5e06319eda06f020e43594a9c230972d/D/G/DG-SATAPCI-1_small_1.jpg] |
| + | Buy Game Console Adapters from [http://www.easymg.com/game-console-adapters.html http://www.easymg.com] or [http://www.diygadget.com/store/game-console-adapters/cat_6.html http://www.diygadget.com] | ||
| − | |||
</span> | </span> | ||
[[Category: How Tos]] | [[Category: How Tos]] | ||
Revision as of 16:47, 6 May 2009
Contents
Buy Game Console Adapters from http://www.easymg.com or http://www.diygadget.com
Why you need to extract the key?
The newer XBOX 360 comes with lite-on DVD drive. It is impossible do dump the firmware from these lite-on DVD drives. However, a new method was developed so you can at least extract the DVD key / identification from these lite-ons. You can then use the key/identification to spoof iXtreme and flash the spoofed iXtreme to a SAMSUNG/LG/BENQ or even the original Lite-on (after Dec 24/2008).
Lite-On DG16D2S
This drive started to appear in machines manufactured after 20th April 2008 (2008-04-20).
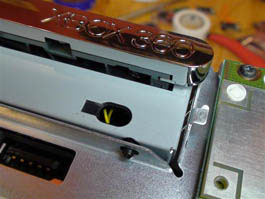
Here is how to figure out whether you have a lite-on or not:
- Remove XBOX 360 front Faceplate
- See which colour the wires are in the hole under the DVD Tray
- Yellow wires: you have lite-on DVD drive
- White wires: you have BENQ drive
You can also search on [XBOX 360 DVD Drive Database] for more information.
How it works
Basically, you will need to perform the following steps:
- Disassemble XBOX 360 (Remove Lite-on DVD drive from XBOX 360)
- Remove Lite-on DVD back cover
- Extract DVD key and identification strings
- Prepare spoofed iXtreme firmware
- Flash the spoofed firmware to a BENQ/SAMSUNG/LG or original Lite-on
Tools required
In order to get the key and flash the DVD drive to a spoofed iXtreme firmware, you will need the following tools or components:
- XBOX 360 case opening tool with TORX bit. Buy from [here]
- Access to your PC's native SATA port, or a PCI to SATA card. A VT6421A powered PCI to SATA card works best. USB to SATA convert does NOT work. Buy VT6421A PCI to SATA controller card from [here].
- A XBOX DVD power adapter. Buy from [here], [here] or [here]
- A Lite-on DVD key extractor. Buy from [here] or [here]
- Xtractor reader, a software used for extracting the key, spoof the firmware and flash the DVD drive. Download from [here]
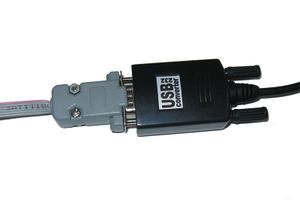
- Access to your computer's serial port. This is also refers to COM port. If your computer doesn't have serial port, you can use a USB to COM converter. Buy it from [here] or [here]. You can download the Windows driver for this USB to COM converter [here (non Vista)] and [here (Vista)]
- PortIO32, a library for accessing COM/LPT ports in Windows. Download it from [here]
To make your life easier, we have created a package, contains the XBOX 360 DVD power adapter, HDD adapter and lite-on DVD drive key extractor with optional USB to COM adapter [here]
OK. Let's get started!
Step 1: Disassemble XBOX 360
There are tons instructions on how to disassemble XBOX 360, you can follow these instructions:
[How to disassemble XBOX 360 case]
You need [XBOX 360 Case Opening Tool with TORX bit]
Step 2: Remove Lite-On DVD drive back cover
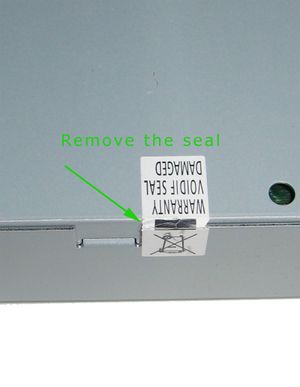
Put the DVD drive on a table, locate the seal on the side of the back cover, use a utility knife to cut the seal:
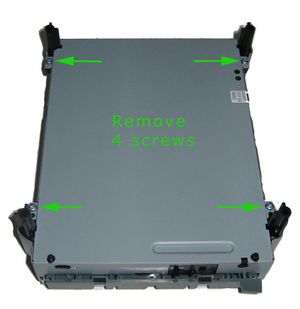
Locate the 4 screws on the DVD drive, remove these screws:
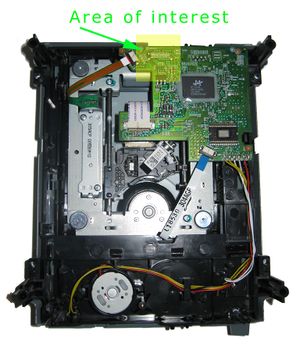
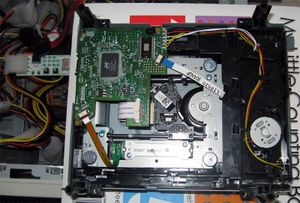
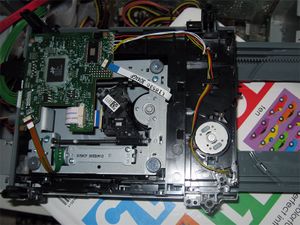
Remove the back cover and get familiar with the area we will be working on:
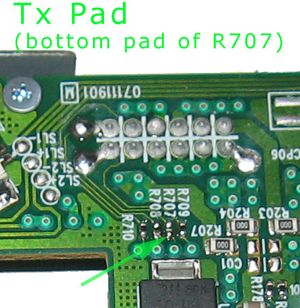
A closer look of the area we will be working on. We will be working on the bottom pad of R707 as shown in the picture below:
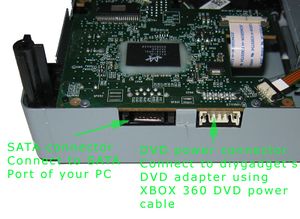
Take a look of the connectors on the DVD, later on you will need to plug the DVD power cable and SATA cable to the connectors on the Lite-on DVD drive:
Step 3: Extract DVD key and identification strings
Check list of required hardwares and softwares
Make sure you have required tools and softwares available:
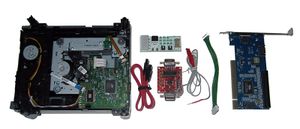
In order to extract the key and identification string, you will need the following hardwares:
From left to right:
- Lite-on DVD drive (From your XBOX 360, of course!)
- XBOX 360 DVD power adapter (Buy from [diygadget.com]
- SATA cable (should come with your PCI to SATA card or Xbox 360 Connectivity Kit V2 bought from [diygadget.com]
- Lite-on DVD key extractor (Buy from [diygadget.com]
- XBOX DVD power cable. You can reuse the one from your XBOX 360.
- PCI to SATA converte. Buy from [here] (Required only if you do NOT have access to a native SATA port)
- USB to COM converter (Required only if your computer does NOT have a COM port. It's accessory of this [package] from [diygadget.com])
- Xtractor Reader. Download from [here]
- PortIO32, a library for accessing COM/LPT ports in Windows. Download it from [here]
- If you have a non-DIYGADGET connectivity kit, please follow Using Liteon Key Extractor Addon with Non-DIYGADGET CK1 or CK2 on how to connect the liteon key extractor addon to your PC. The rest of the tutorial is the same.
Install optional hardwares
You do NOT need to perform this step if you have access to native SATA port and COM port.
Install PCI to SATA converter
If your computer does not have SATA port, you will need to buy a PCI to SATA card and install it on your computer before you can extract the key and identification string.
Buy VT6421A PCI to SATA controller card from [diygadget.com]
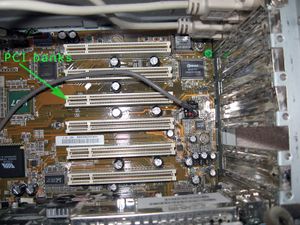
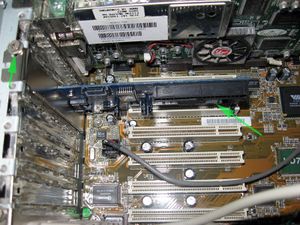
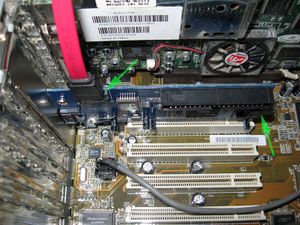
Unplug the power of your computer, open the case, locate a free PCI bank:
Insert the PCI to SATA controller card into a free PCI bank and screw it firmly:
Reattach the cover of your computer, and reconnect the power cable. Boot the machine.
Download the driver from [diygadget.com]
Install the PCI to SATA controller driver.
Install USB to Serial (COM) port driver
If you purchased a USB to COM adapter from [diygadget.com] or received it as part of your package purchased from [diygadget.com], you must install the driver BEFORE you plug the converter to your USB port. Follow the links below to download the driver:
- Win2K/XP/2003: download from [here]. As of Dec 21, the latest version of the driver is v2.0.4.102.
- Windows Vista: download from [here]
Please follow the instructions in the driver to install the software BEFORE you plug your USB to COM adapter.
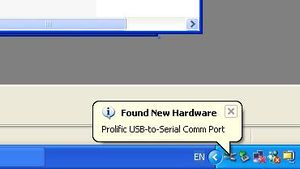
After successfully installed the USB to COM driver, plug the cable to your free USB port. Your will see the following pop up message on your screen:
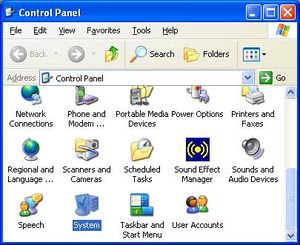
Now you need to found out which port is assigned to. Go your the control panel of your computer, double click on the "System" icon:
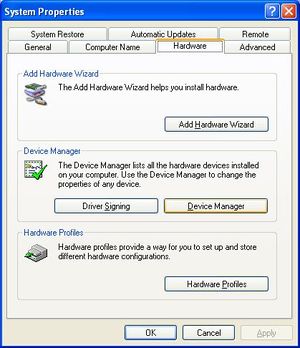
Click on the "Hardware" tab, and then click on the "Device Manager" button:
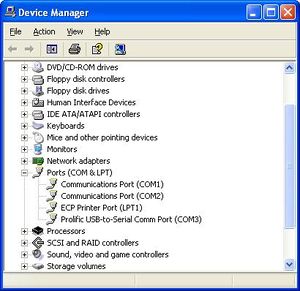
Now expend "Port (COM and LPT)", you should see something similar to the screen below. In my case, I have it assigned COM3 (or you can say port 3):
Write down the COM port number. You will need this later on.
Download required software
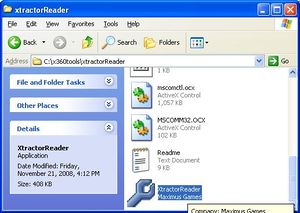
You need PortIO32, a library for accessing COM/LPT ports in Windows. Download it from [here]. As I have mentioned before, you also need software to extract the key and spoof the firmware. We recommend Xtractor Reader. You can download it from [here]. The file is in RAR format. You need to use WinRAR to uncompress it. Download WinRAR from [here]. This is how it looks like after you uncompress xtractor reader (I uncompressed it into C:\x360tools, you can unzipped it to a different directory if you wish):
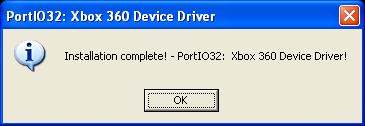
You also need to unzip PortIO32.zip and run the PortIO32.exe. You will see this after you successfully installed PORTIO32:
There are also some other softwares available, such as DVDKey32 or Xecuter Ck3 Tool, but we have found that Xtractor Reader is the best one. It's fast as well. We use Xtractor Reader in this tutorial, but you can use DVDKey32 or Xecuter Ck3 Tool as well. They should work.
Connect hardwares together
In order to successfully extract the key, you need the following hardwares:
- Access to your PC's native SATA port, or a PCI to SATA card. A VT6421A powered PCI to SATA card works best. USB to SATA convert does NOT work.
- A XBOX DVD power adapter. Buy from [here], [here] or [here]
- A Lite-on DVD key extractor. Buy from [here] or [here]
- Xtractor reader, a software used for extracting the key, spoof the firmware and flash the DVD drive. Download from [here]
- Access to your computer's serial port. This is also refers to COM port. If your computer doesn't have serial port, you can use a USB to COM converter. Buy it from [here] or [here]. You can download the Windows driver for this USB to COM converter [here (non Vista)] and [here (Vista)]
In previous steps, you should have installed PCI to SATA controller card (if needed), you should have also installed the driver for USB to COM adapter as well (if needed). Now let's connect all these hardwares together.
First, you need to turn off your PC and unplug the power of the PC (physically unplug the power cord from the wall outlet). Then open the case of your PC, find one open Molex power connector. The Molex power is the standard connector which provide power to HD, DVD inside your PC. It has 4 wires, yellow, black, black and red. You cannot miss it :-)
Now, put a book on the case of the pc, and put the Lite-On DVD on the book (thus the PC case won't touch DVD):
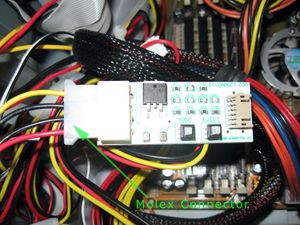
Connect the DVD adapter to the Molex connector:
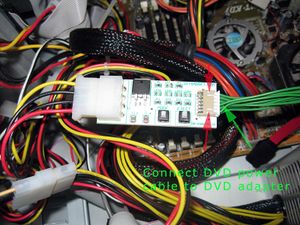
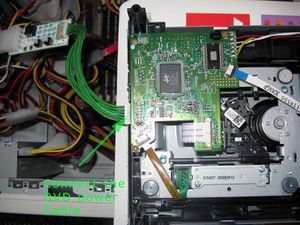
Then use the XBOX 360 DVD power cable connect the DVD power adapter:
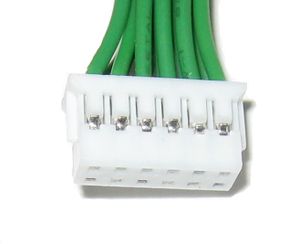
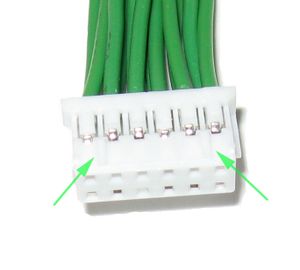
Make sure the DVD power cable is connected correctly. There is only one way to connect it, if you could not insert the header into the socket, then you are doing something wrong. If you double check the header of the DVD power cable, you will notice that one side is different than the other side. Thus this is to make you you don't plug in in the wrong way. Do NOT push too hard!!!
Connect the other end of the DVD power cable to Lite-On DVD drive:
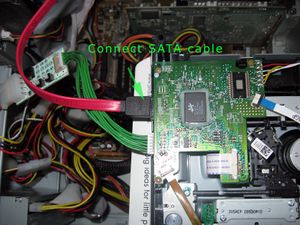
Connect the SATA cable to Lite-On DVD drive:
Connect the other end of the SATA cable to your PC's native SATA port or the PCI to SATA controller card installed in previous steps:
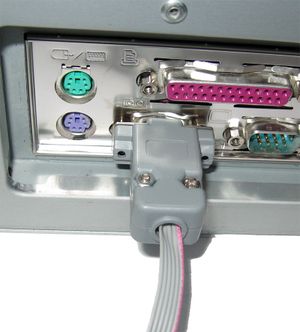
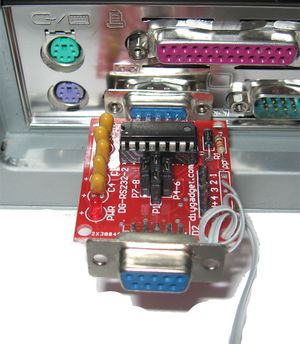
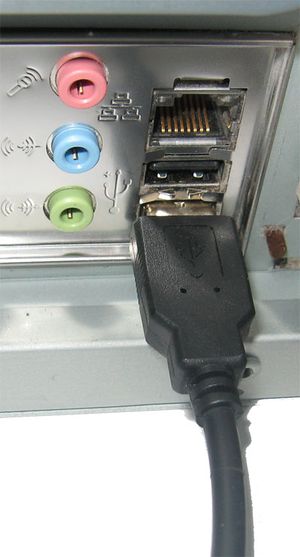
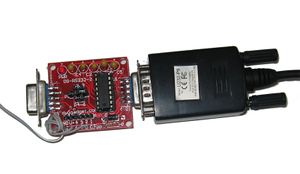
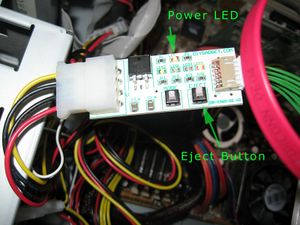
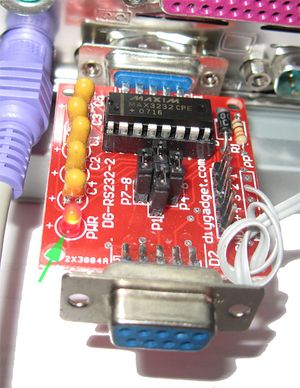
Plug the diygadget's lite-on extractor addon (DB9 version or non-DB9 version) to your PC or USB to COM port and also plug the USB to COM adapter to a free USB port(if needed):
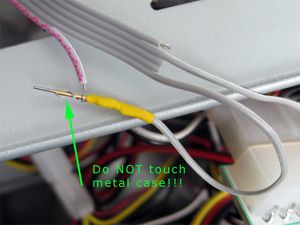
Make sure the Extractor's alligator clip and the spear do not touch anything in the PC.
Now you have all the hardwares connected. Do a final check again, make sure everything is OK.
Extract the key, identification and inquiry files
Double check the hardwares connections, make sure no short circuit, etc. If you are sure, now you can plug the PC's power cord to the wall outlet, and turn on the PC.
Once the PC is on, the power LED on DVD power should light. If the DVD tray is opened when you turn on PC, press the eject button on the DVD power adapter to close the tray.
Now, let run the Xtractor Reader. Double click on "XtractorReader" icon in your windows explore:
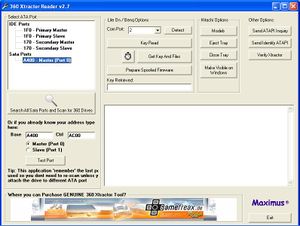
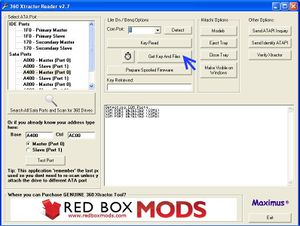
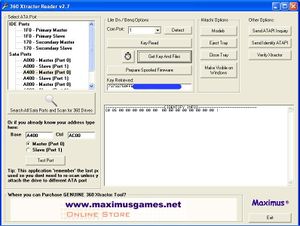
Now if everything goes ok, you will see the following screen. Click on "Search All SATA Ports And Scan for 360 Drives":
You will see this message box, click "Yes":
Another message box, click "Yes" again:
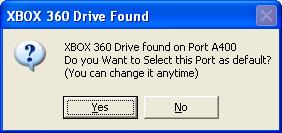
After probably 5 seconds, you will see this pop up, congratulations! You almost there! Click "Yes":
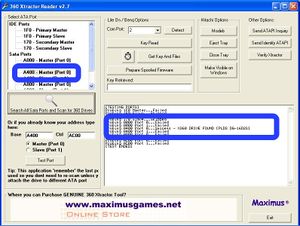
Now you are back to Xtractor's main screen. You now see all the information are populated:
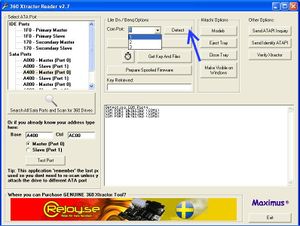
Click the "Detect" button to detect COM port. Select your COM port from the list. If you use native COM port, you will be very likely to use COM1 or COM2. If you use the USB to COM adapter, select the COM port you have written down from previous step. In my case, I use COM 1, so I select 1:
Now, press the eject button on the DVD adapter to fully open the DVD tray. From now on, don't touch eject button until you retrieved the files.
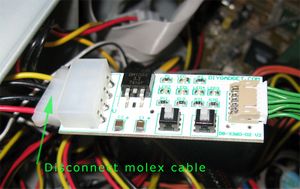
Disconnect the Molex connector from the DVD power adapter:
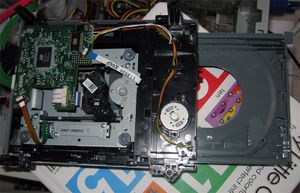
Manually push the DVD tray half in:
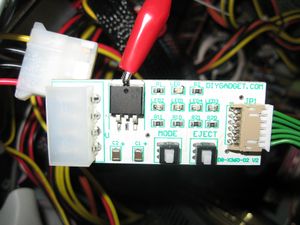
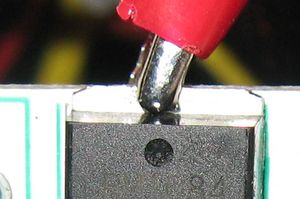
Now, attach the alligator clip of the Extractor to the back of the voltage regulator on DVD power adapter. If you purchased the Extractor without alligator clip, you can ignore this step.
Zoom in...
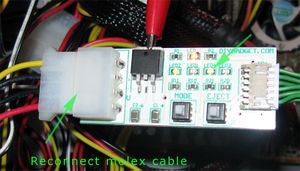
Reconnect Molex connector back to DVD power adapter, the LED should light again:
If you received the non-DB9 version of the Extractor, the LED on the Extractor should on as well:
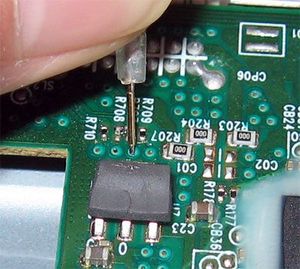
Use you left hand to let the head of the spear touch the bottom pad of R707 or the hole below R707:
Click "Get key and files" button:
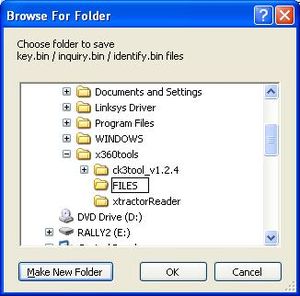
After a few seconds, you will see the following "Save as" dialog. Browse to an existing directory or create a new directory and click OK:
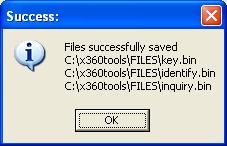
You will see this screen after the files are successfully saved:
The key is also displayed on Xtractor Reader's main screen:
Well done! You now have the required files!
You better do the above steps a couple more times just to verify the key are exactly the same. Hit eject button on DVD power adapter to close tray, than hit eject button again to open the tray. Manually push the tray half in, disconnect Molex power connector, click "Get Key and Files" and save to a different location, compare the files against the first try, if they are the same, you are done!
What to do next
First, write down the COM port number and the SATA Port address you have used! You will need these two numbers when flashing firmware back to you lite-on!
Now you need to spoof the firmware and flash your liteon.
You need to follow the following tutorials:
You do NOT need to connect the extractor when spoofing or flashing your DVD drive.
Troubleshooting
Could not run Xtractor Reader
You may missing .NET framework. Download it [here]
Error when retrieving the files
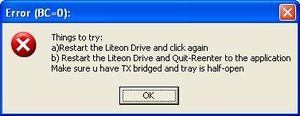
If you see this message box:
You just need to try it again, power off DVD adapter by disconnect Molex connector, eject tray, push it half in, reconnect the molex connector...
Could not read the key
If you keep getting errors when reading the key, make sure you have selected the correct COM port. If you are 100% percent sure you have selected the correct COM port, you need to do a loopback test to check whether the COM port is working properly.
First do a naked loopback test on the COM port (either native COM port or the USB to COM adapter) without the Extractor. Please follow the instruction [here].
If the naked loopback test passed, now you need to do a loopback with the Extractor.
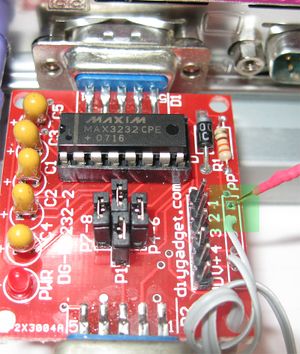
Plug the Extractor to the COM port or your USB to COM adapter. Connect everything back in normal, attach the alligator clip to the back of the voltage regulator and connect the molex connector to the DVD power adapter. If you have non-DB9 version of the extractor, make sure the LED is on:
Instead of shorting pin 2 and 3 on the COM port, you are now shorting the pins on the Extractor.
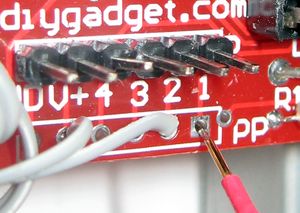
If you have a non-DB9 version of the Extractor, hold the spear on the #1 hole on the PCB as shown in the following pictures. The first pad is RX and the Spear is connected to TX:
If you have a DB9 version of the Extractor, short the Spear with the wire #1 (next to spear) as shown below. Make sure the spear or wire #1 do not touch anything else, especially computer case:
Now repeat the terminal program test mentioned [here]. Ignore step one, start from step 2.
This should work. If this works then you probably the spear doesn't touch the bottom pad of R707 or the hole below R707. You need to try it again.
Buy Game Console Adapters from http://www.easymg.com or http://www.diygadget.com

10 PCS, 10cm x 10cm, 2 layers prototype for $38.80 shipped!


