Difference between revisions of "Xbox 360 Lite On DVD Key Dumping - TIAO's Serial Key Extractor"

10 PCS, 10cm x 10cm, 2 layers prototype for $38.80 shipped!
| Line 66: | Line 66: | ||
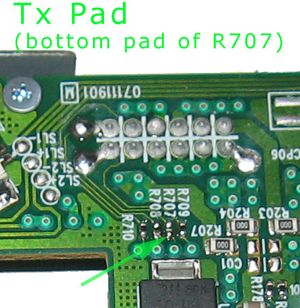
[[Image:liteon_dvd_aoi_zoom_in.jpg|none|thumb|Bottom pad of R707 on Lite-On DVD drive]] | [[Image:liteon_dvd_aoi_zoom_in.jpg|none|thumb|Bottom pad of R707 on Lite-On DVD drive]] | ||
| + | |||
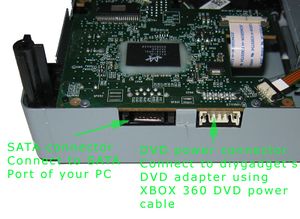
| + | Take a look of the connectors on the DVD, later on you will need to plug the DVD power cable and SATA cable to the connectors on the Lite-on DVD drive: | ||
| + | |||
| + | [[Image:Liteon_dvd_sata_connector_power_connector.jpg|none|thumb|Sata and power connector on Lite-on DVD drive]] | ||
| + | |||
== Step 3: Extract DVD key and identification strings == | == Step 3: Extract DVD key and identification strings == | ||
Revision as of 00:00, 22 December 2008
Contents
Why you need to extract the key?
The newer XBOX 360 comes with lite-on DVD drive. It is impossible do dump the firmware from these lite-on DVD drives. However, a new method was developed so you can at least extract the DVD key / identification from these lite-ons. You can then use the key/identification to spoof iXtreme and flash the spoofed iXtreme to a SAMSUNG/LG/BENQ or even the original Lite-on (after Dec 24/2008).
Lite-On DG16D2S
This drive started to appear in machines manufactured after 20th April 2008 (2008-04-20).
Here is how to figure out whether you have a lite-on or not:
- Remove XBOX 360 front Faceplate
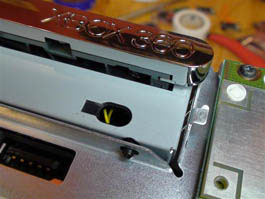
- See which colour the wires are in the hole under the DVD Tray
- Yellow wires: you have lite-on DVD drive
- White wires: you have BENQ drive
You can also search on [XBOX 360 DVD Drive Database] for more information.
How it works
Basically, you will need to perform the following steps:
- Disassemble XBOX 360 (Remove Lite-on DVD drive from XBOX 360)
- Remove Lite-on DVD back cover
- Extract DVD key and identification strings
- Prepare spoofed iXtreme firmware
- Flash the spoofed firmware to a BENQ/SAMSUNG/LG or original Lite-on
Tools required
In order to get the key and flash the DVD drive to a spoofed iXtreme firmware, you will need the following tools or components:
- Access to your PC's native SATA port, or a PCI to SATA card. A VT6421A powered PCI to SATA card works best. USB to SATA convert does NOT work.
- A XBOX DVD power adapter. Buy from [here], [here] or [here]
- A Lite-on DVD key extractor. Buy from [here] or [here]
- Xtractor reader, a software used for extracting the key, spoof the firmware and flash the DVD drive. Download from [here]
- Access to your computer's serial port. This is also refers to COM port. If your computer doesn't have serial port, you can use a USB to COM converter. Buy it from [here] or [here]. You can download the Windows driver for this USB to COM converter [here (non Vista)] and [here (Vista)]
To make your life easier, we have created a package, contains the XBOX 360 DVD power adapter, HDD adapter and lite-on DVD drive key extractor with optional USB to COM adapter [here]
OK. Let's get started!
Step 1: Disassemble XBOX 360
There are tons instructions on how to disassemble XBOX 360, you can follow these instructions:
[How to disassemble XBOX 360 case]
Step 2: Remove Lite-On DVD drive back cover
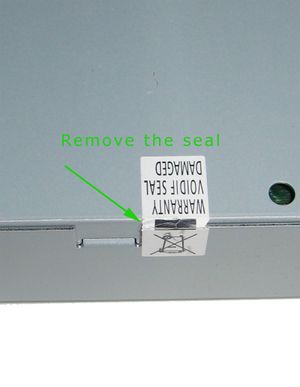
Put the DVD drive on a table, locate the seal on the side of the back cover, use a utility knife to cut the seal:
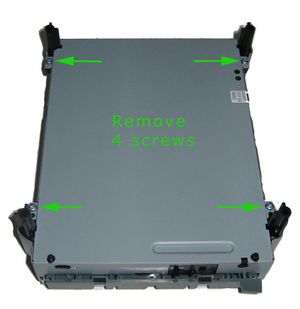
Locate the 4 screws on the DVD drive, remove these screws:
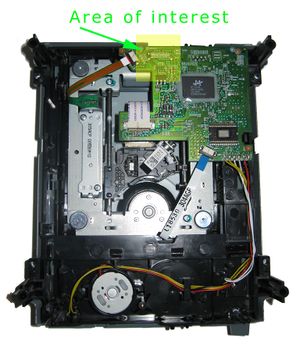
Remove the back cover and get familiar with the area we will be working on:
A closer look of the area we will be working on. We will be working on the bottom pad of R707 as shown in the picture below:
Take a look of the connectors on the DVD, later on you will need to plug the DVD power cable and SATA cable to the connectors on the Lite-on DVD drive:
Step 3: Extract DVD key and identification strings
Check list of required hardwares and softwares
Make sure you have required tools and softwares available:
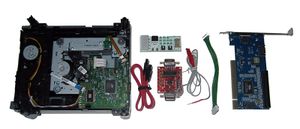
In order to extract the key and identification string, you will need the following hardwares:
From left to right:
- Lite-on DVD drive (From your XBOX 360, of course!)
- XBOX 360 DVD power adapter (Buy from [diygadget.com]
- SATA cable (should come with your PCI to SATA card or Xbox 360 Connectivity Kit V2 bought from [diygadget.com]
- Lite-on DVD key extractor (Buy from [diygadget.com]
- XBOX DVD power cable. You can reuse the one from your XBOX 360.
- PCI to SATA converter (Required only if you do NOT have access to a native SATA port. Buy one with VT6421A)
- USB to COM converter (Required only if your computer does NOT have a COM port. It's accessory of this [package] from [diygadget.com])
- Xtractor Reader. Download from [here]
Install optional hardwares
You do NOT need to perform this step if you have access to native SATA port and COM port.
Install PCI to SATA converter
If your computer does not have SATA port, you will need to buy a PCI to SATA card and install it on your computer before you can extract the key and identification string.
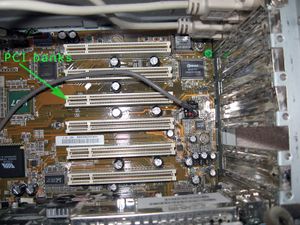
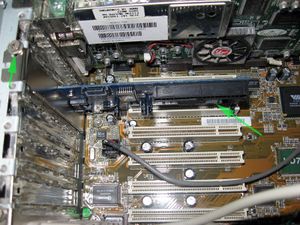
Unplug the power of your computer, open the case, locate a free PCI bank:
Insert the PCI to SATA controller card into a free PCI bank and screw it firmly:
Reattach the cover of your computer, and reconnect the power cable. Boot the machine and install the required PCI to SATA controller driver (following the instructions provided by your PCI to SATA controller card)
Install USB to Serial (COM) port driver
If you purchased a USB to COM adapter from [diygadget.com] or received it as part of your package purchased from [diygadget.com], you must install the driver BEFORE you plug the converter to your USB port. Follow the links below to download the driver:
- Win2K/XP/2003: download from [here]. As of Dec 21, the latest version of the driver is v2.0.4.102.
- Windows Vista: download from [here]
Please follow the instructions in the driver to install the software BEFORE you plug your USB to COM adapter.
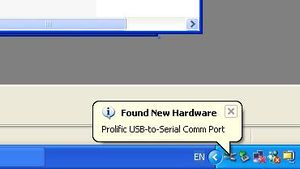
After successfully installed the USB to COM driver, plug the cable to your free USB port. Your will see the following pop up message on your screen:
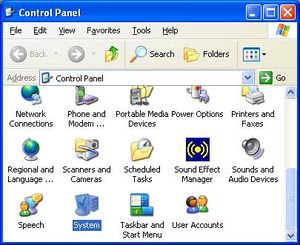
Now you need to found out which port is assigned to. Go your the control panel of your computer, double click on the "System" icon:
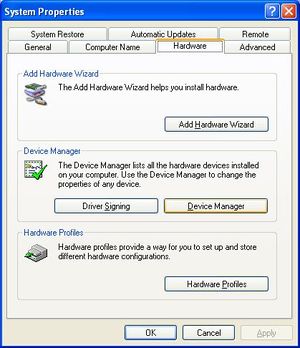
Click on the "Hardware" tab, and then click on the "Device Manager" button:
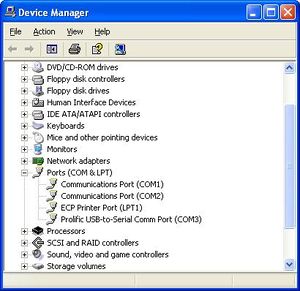
Now expend "Port (COM and LPT)", you should see something similar to the screen below. In my case, I have it assigned COM3 (or you can say port 3):
Write down the COM port number. You will need this later on.

10 PCS, 10cm x 10cm, 2 layers prototype for $38.80 shipped!
