Flash XBOX 360 Lite-on DVD drive with spoofed firmware

10 PCS, 10cm x 10cm, 2 layers prototype for $38.80 shipped!
Contents
Buy Game Console Adapters from http://www.easymg.com or http://www.diygadget.com
What do you need to flash the spoofed firmware to your Lite-on DVD drive?
This is a good question. There are many ways to flash your Lite-on DVD drive. You can use Windows based applications such as Jungle Flasher or DosFlash32 etc. However, there are many reports that once you have erased the firmware of your lite-on, you PC will freeze whenever you power on the Lite-on. We have found the DOS based Dosflash works way better than these Windows applications. It never freezes your PC!
There you go, you will need the following stuff before you can flash your lite-on in DOS:
- Access to a SATA port. Buy VT6421A PCI to SATA controller card from [diygadget.com]
- A bootable media, such as bootable floppy disk, a bootable USB key or a bootable CD, which can boot your machine in native DOS environment. DOS prompt in WINDOWS won't work!
- lite-on-erase.exe (a.k.a l_o_eras.exe). We found the lite-on-erase.exe is the best tool in DOS to erase your Lite-On firmware. This is part of [iXtreme 1.5]
- DOSFLASH.exe. Use this to flash the Lite-on in DOS mode. This is part of [iXtreme 1.5]
- Spoofed lite-on firmware. Don't have it yet? Follow Spoof XBOX 360 Lite-on DVD drive firmware to get the spoofed firmware
Step 1: Prepare (2-8 minutes)
In this step you need to have all required files on the bootable media. This including DOSFLASH.exe, lite-on-erase.exe and spoofed firmware. The reason for have all files in the bootable media is because that most Windows nowdays use NTFS file system, the standard Win98 DOS cannot access it.
Use a bootable USB key (2-8 minutes)
There are multiple way to create bootable USB key. We recommend the following two methods. You should try iprep first. (If the USB key size exceeds 2GB, you may not be able to boot it from USB if you have some old mother board)
Use iprep to create a bootable USB key (2 minutes)
You should try this method first. This is the easiest way to make a bootable USB key. However if this doesn't work for you, you can try the next method, using HP USB Disk Format Tool.
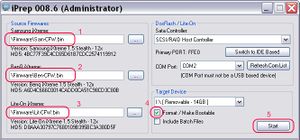
First, you need to download iprep and unzip to a folder. Then launch iprep.exe. On the main screen, select iXtreme firmware for Samsung, Benq and liteon respectively (1,2,3 as shown in pic), make sure "Format/make bootable" is checked (4). In the drop down, select the USB key drive (in my case, it is OCZ Rally 16G USB key, drive I:). Then click "Start" (5):
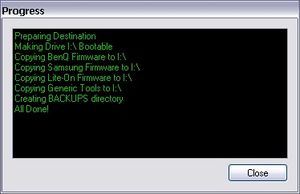
You will see the following screen once the process is finished. Click Close:
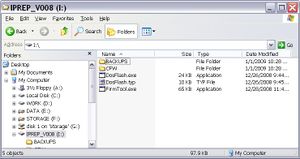
At this point, you now have a bootable USB key. If you browse the files on the USB key in Windows file explorer, you will see these files/directories:
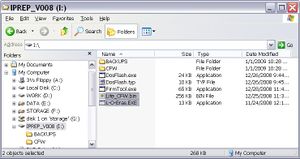
The next step is to copy L-O-Eras.exe and spoofed lite-on firmware to the USB key (iPrep already copied DOSFLASH.TYP and DOSFLASH.EXE by default):
| File | From |
| L-O-Eras.exe | DOS folder in iXtreme 1.5 |
| Lite-CFW.bin | Spoofed lite-on firmware created from previous tutorial (Spoof XBOX 360 Lite-on DVD drive firmware) |
You should have these files in your USB key after the above step:
Now you have finished this step. You can proceed with next step to flash your lite-on in DOS.
Use HP USB Disk Format Tool (~8 minutes)
If the bootable USB key created by iPrep doesn't work for you, you can try to create bootable USB key by using Use HP USB Disk Format Tool. Please follow the instructions [here]. After the bootable USB key is created, you need to copy the following files to your USB key so you can use them to erase and flash your lite-on:
| File | From |
| DosFlash.exe | DOS folder in iXtreme 1.5 |
| DosFlash.typ | DOS folder in iXtreme 1.5 |
| L-O-Eras.exe | DOS folder in iXtreme 1.5 |
| Lite-CFW.bin | Spoofed lite-on firmware created from previous tutorial (Spoof XBOX 360 Lite-on DVD drive firmware) |
Now you have finished this step. You can proceed with next step to flash your lite-on in DOS.
Use a bootable floppy disk (~2 minutes)
If you don't want to use bootable CD or your mother board is old enough that does not support booting from USB, you can use a bootable floppy to flash your lite-on. This task takes 2 minutes.
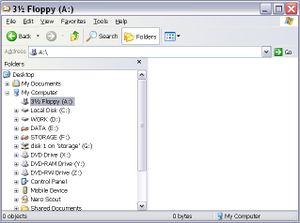
Insert a floppy disk into your A: drive. Make sure you DO NOT need the content of the floppy disk. This process will destroy all files on your floppy if it is not empty:
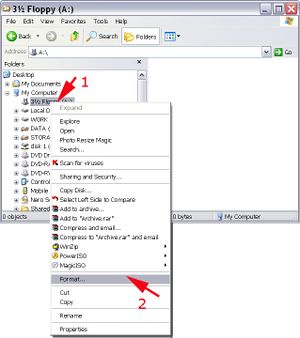
Right mouse click on drive A: (1) in file explorer, select 'Format...' from the menu (2):
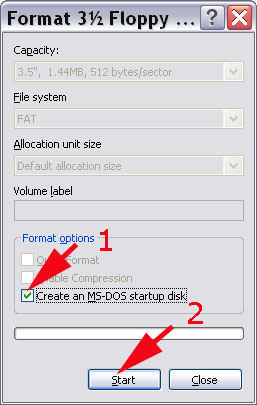
Make sure 'Create an MS-DOS startup disk' is selected, then click on 'Start':
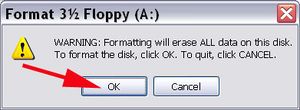
Click 'OK' to accept the warning:
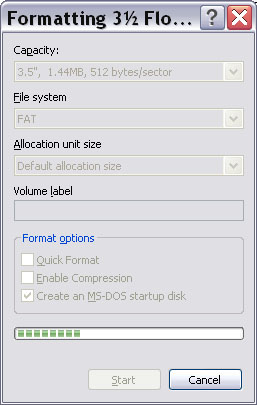
Formatting disk A:
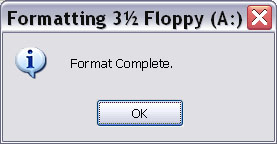
Disk A: is formatted. Click OK:
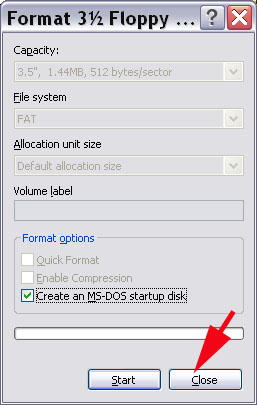
Click 'Close' to close the dialog:
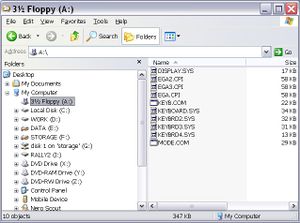
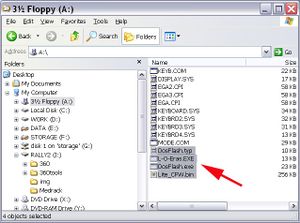
Go back to file explorer, you will find all system files were copied:
Now, copy the following files to A:
| File | From |
| DosFlash.exe | DOS folder in iXtreme 1.5 |
| DosFlash.typ | DOS folder in iXtreme 1.5 |
| L-O-Eras.exe | DOS folder in iXtreme 1.5 |
| Lite-CFW.bin | Spoofed lite-on firmware created from previous tutorial (Spoof XBOX 360 Lite-on DVD drive firmware) |
Now you have finished this step. You can proceed with next step to flash your lite-on in DOS.
Use a bootable CD (~8 minutes)
Download the Win98 bootable ISO image from [here], and save to your hard disk.
Download Magic ISO from [here], and install it. The trial version is free. The trial version is good enough for our task.
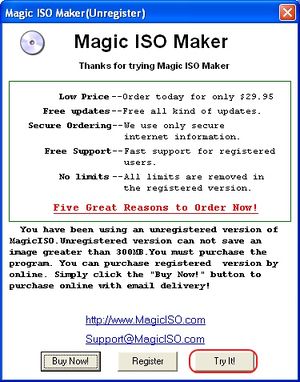
Launch Magic ISO, click on Try it:
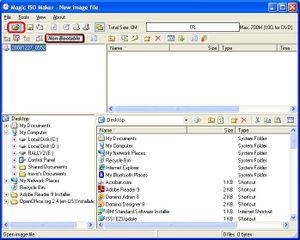
Now you are on the main screen of Magic ISO. Click on the small "open file" icon on the top-right corner of the screen:
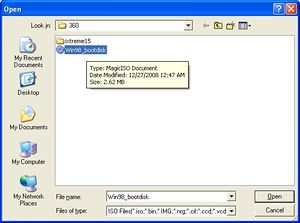
Select the Win98_bootdisk.iso you downloaded from previous step, and click open:
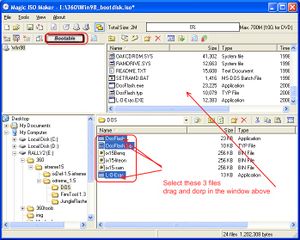
Now you are back to the main screen again. You will notice that the icon is changed from non-bootable to bootable (top-right side). Now browse the DOS folder of iXtreme 1.5, hold CTRL key and select Dosflash.exe, dosflash.typ and l-o-eras.exe, drag and drop these files to the window above:
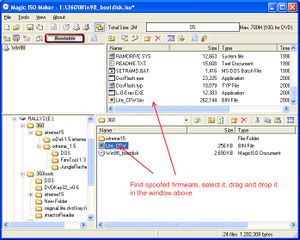
Now, browse to the folder contains the spoofed firmware, select it, drop it to the window above too:
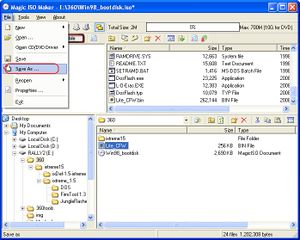
Now, you have added all required files for flashing your firmware. You need to save it to a new ISO file. Click on File and select Save As...:
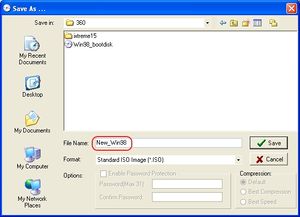
Browse to a writeable folder, name it as New_Win98.iso, click Save:
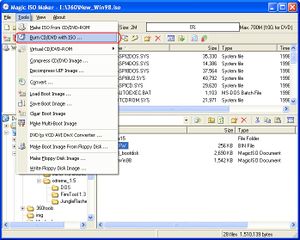
Now we need to burn the image to a CD. Select Tools/Burn CD/DVD with ISO...{
Click on the icon for CD/DVD Image File:
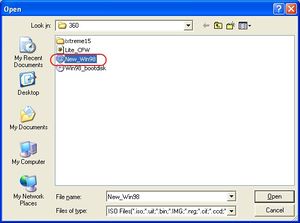
Select the newly created New_Win98.iso and click Open:
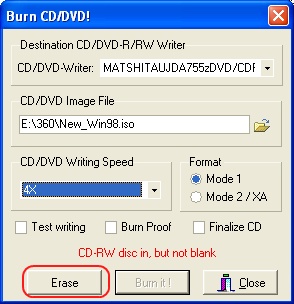
You are back to Burn CD/DVD dialog. Eject CDRW tray, insert a blank CD or CD-RW media. In my case, I inserted a non-empty CD-RW media:
Select writing speed:
I my case, I need to erase the media. If your inserted in a blank CD, then you can ignore the erase step. Click on Erase to erase the media:
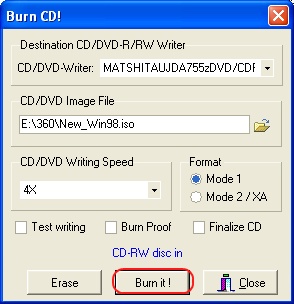
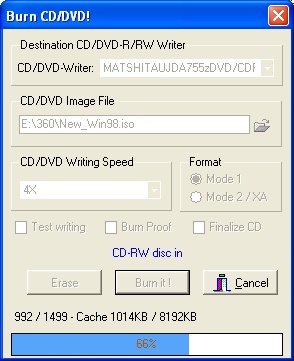
Now click "Burn it":
Burning:
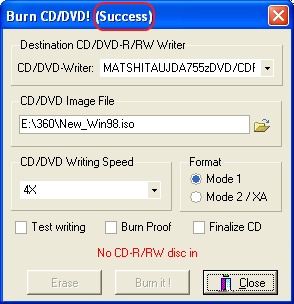
Done! CD will be automatically ejected and the title is change to (success):
Now, you have a bootable CD contains all required files for flashing your Lite-on DVD!
Step 2: Erase Lite-on DVD drive firmware (~4 minutes)
WARNING: Make sure you have retrieved the key/inquiry/identify files. Once you have erased your Lite-on, there is no going back!!!! Save the key/identify/inquiry files in a safe place, such as burn on CD, save it in your email account, etc!!!!
If you have created a bootable floppy disk, insert floppy to floppy drive, reboot the machine. (You may need to change BIOS settings to enable boot from floppy).
If you have created a bootable CD, insert the bootable CD created in previous steps to your machine's CD or DVD ROM, reboot your machine from CD. You may need to change your BIOS setting to allow CD-ROM/DVD-ROM as the first bootable device.
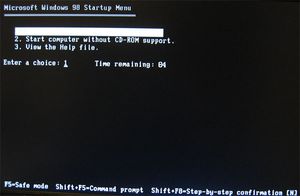
Bootable CD: You will be presented with this screen. Select first option: Start computer with CD-ROM support and press Enter:
After a few seconds, the system is booted with DOS. Bootable CD: change the drive letter to your CD ROM. If you don't know, just try C:, D:, E: until you find out it. In my case, the CD-ROM is D: drive. Do a dir command, you should see these four files: L-O-ERAS.EXE DOSFLASH.EXE DOSFLASH.TYP LITE_CFW.BIN
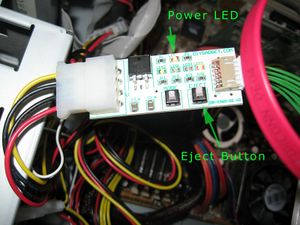
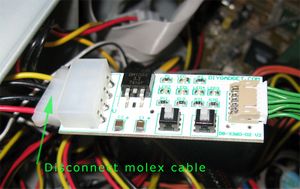
Now, connect Lite-on to the SATA port using SATA cable, connect the DVD power cable to DVD adapter and Lite-On DVD Drive. Then connect the Molex connector to DVD power adapter:
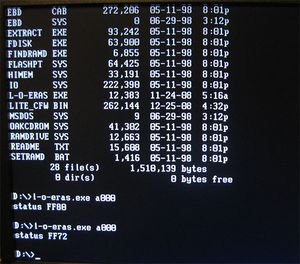
Run L-O-ERAS.EXE <SATA port number>. In my example, I have Lite-on at A000, so I ran: L-O-ERAS.EXE A000:
If you see status FF80, then run the command again, until you see status 0x72 which stands for "erased". Now, disconnect molex connector from DVD power adapter:
You have erased the factory firmware in your lite-on!
Step 3: Flash Lite-on DVD drive with spoofed firmware (~3 minutes)
Make sure the Molex connector is NOT connected to the DVD power adapter. Reboot the machine using the bootable CD we created again. Once system is booted in DOS, reconnect Molex connector to DVD power adapter:
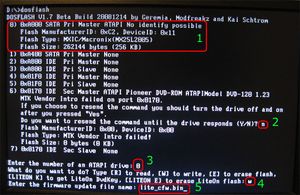
Find the drive contains DOSFLASH.EXE, type DOSFLASH.exe at the command line, and hit Enter. You will be presented with the following screen:
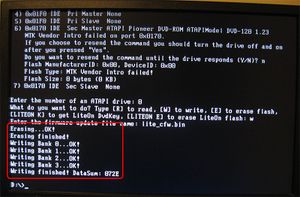
It displays the flash chip information of your lite-on (1). Answer N (2), select 0 (3), select W (4), and type in the spoofed firmware file name lite_cfw.bin (5). The underscore after lite_cfw.bin is the cursor so don't type in it! Now hit Enter:
You are done! Power off PC, put Lite-On back to your XBOX 360, it should work now!
Troubleshooting
Status is not 0x72 after erase
You may see different status code (0XD2,0X52, 0X80, 0XFF etc) after you run l-o-eras.exe <sata port number>. If you see this happens, you can try the following:
- Run l-o-eras.exe <sata port number> again, you may get Status 0x72 after a few more tries.
- If above solution doesn't work, disconnect Molex connector to your DVD power adapter, wait at least 10 seconds, reconnect the Molex connector and run l-o-eras.exe <sata port number> again.
- If you have a RAID SATA card, connect the Lite-On DVD Drive to a different SATA port on you PCI controller or mother board, and try again.
DOSFlash hangs when writing to BANK 0, 1, 2 or 3
- Try to connect Lite-On DVD drive to a different SATA port.
- Power off PC, unplug PC's power plug, disconnect Molex connector from your DVD power adapter, wait at least 10 seconds, then re-plug PC's power cord, boot PC in DOS, re-connect Molex to DVD power adapter, run DOSFLASH again
Buy Game Console Adapters from http://www.easymg.com or http://www.diygadget.com

10 PCS, 10cm x 10cm, 2 layers prototype for $38.80 shipped!
